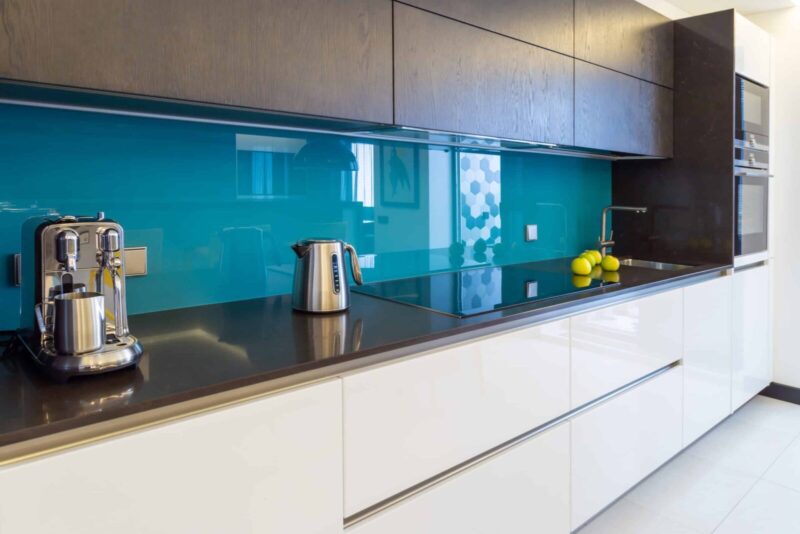
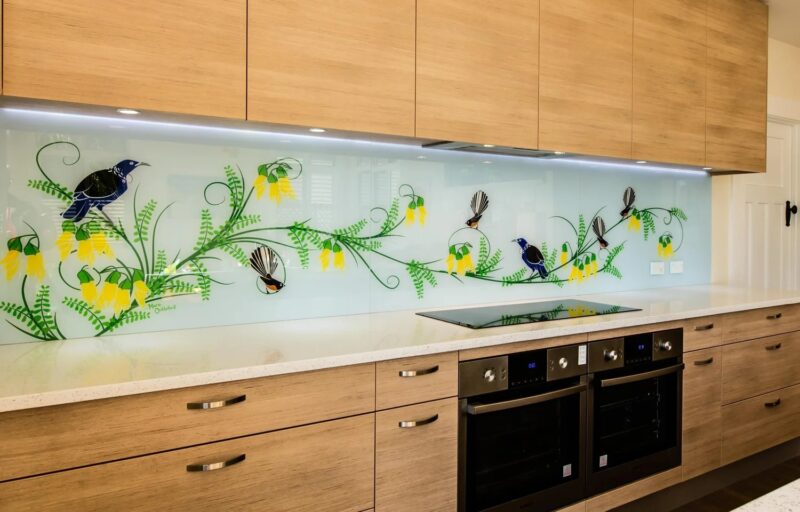
Glass splashbacks are one of the cleanest looking options for modern kitchens. They offer a smooth surface, easy cleaning, and a seamless finish that instantly upgrades the space.
However, the success of the final installation often depends on the details. Cutouts, corners, and socket gaps are the areas where mistakes show most, especially when the splashback is made to measure.
Cutouts and why accuracy matters
With made to measure glass splashbacks, cutouts must be planned before the glass is toughened. Once toughened, glass cannot be drilled or altered without breaking, so measurements must be exact.
This includes sockets, switches, extractor controls, and any pipework or unusual wall features. Even a few millimetres of error can cause the panel to sit incorrectly or leave visible gaps around fittings.
Most suppliers recommend templating or using a detailed measuring guide. A proper template helps confirm the positions of sockets and ensures that the panel aligns with the worktop and cabinets.
Cutout shapes also matter for the final look. Clean, consistent corners around sockets and switches create a professional finish and reduce the chance of stress points forming in the glass.
If you are planning multiple panels, the cutouts must also align across joins. Poor alignment can make the entire wall look uneven, even if the colour and glass quality are excellent.
Corners, joins, and tricky kitchen layouts

Kitchen walls are rarely perfectly square, especially in older homes. This is where corners become one of the biggest challenges with glass splashbacks.
With made to measure glass splashbacks, corner angles should be measured carefully rather than assumed to be a perfect 90 degrees. If the angle is slightly off, the panel may not fit properly or may leave an uneven gap.
Some kitchens require splashbacks to wrap around a corner or meet at a return. In these cases, installers often use separate panels that meet neatly, rather than forcing one piece into a tight angle.
Joins should be planned so they are as discreet as possible. A good supplier will advise on where seams should go, usually in less noticeable areas rather than directly behind the hob or main sink zone.
For a modern look, many homeowners choose larger panels to reduce joins. Fewer seams usually means a cleaner finish and easier cleaning over time.
Socket gaps, edge finishing, and final detailing

Socket gaps are one of the most common concerns when ordering glass splashbacks. Even with accurate measuring, small gaps can appear due to wall movement, slight unevenness, or installation tolerances.
Most installers allow a small clearance around socket cutouts so the panel can be fitted without stress. The socket faceplate then covers the edge, creating a clean and safe finish.
In some cases, longer screws are required to bring sockets forward so they sit flush on top of the glass. This is a normal part of fitting and should be planned before installation day.
Edge finishing also affects both safety and appearance. Polished edges look more premium and reduce sharpness, while rounded corners can help prevent chipping and make cleaning easier.
Finally, sealing is essential, especially along the bottom edge where the splashback meets the worktop. A neat bead of silicone prevents water from getting behind the panel and protects the wall over time.
Conclusion
Glass splashbacks look simple once installed, but the final quality depends on careful planning. Cutouts must be measured precisely, corners must match real wall angles, and socket gaps must be handled correctly.
By choosing made to measure glass splashbacks and focusing on these details, you can achieve a smooth, professional finish that lasts for years. The result is a kitchen wall that looks modern, clean, and effortless.